How to Use a Dial Caliper
The manufacturing industry uses numerous measuring instruments to ensure quality. These instruments, such as micrometers, calipers and indicators are often used to measure parts for accuracy. Even the slightest variation of size can cause a part not to fit or work properly.
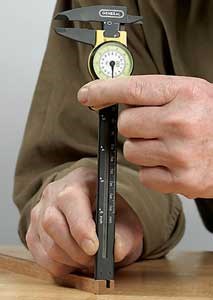
A dial caliper is one type of precise measuring instrument used in the manufacturing industry. Several types of measurements can be taken with a dial caliper. The outside measuring contacts can measure the outside diameter, the length, the height, or the thickness of a part. The inside measuring contacts can measure the inside diameter of a part. The depth rod at the end of the bar can measure the depth of a part and the step measurement (the hidden use of a caliper!)
Zero your Caliper
Before a dial caliper is used to measure a part, it should be checked to make sure its zero setting is correct. This can be accomplished quickly in a few short steps.
1. Wipe the blades of the outside measuring contacts with a clean cloth .
2. Close the contacts and hold with light pressure.
3. The dial indicator should be on 0.
4. If the dial indicator is not on 0, loosen the bezel clamp. Rotate the bezel so that the dial indicator is pointing to 0.
5. Tighten the bezel clamp.
Outside Measurements
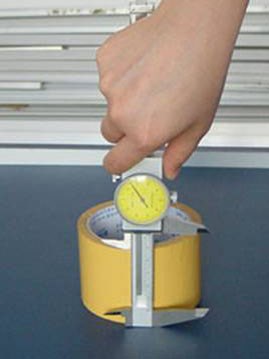
For outside dimensions, place the outside measuring contacts around the object to be measured. Close the moveable jaw around the object. You should apply just enough pressure that the contacts can hold the object, but do not squeeze the jaws too tightly. This can give false measurement.

Inside Measurements
The smaller jaws on the top of the caliper are used for inside measurements. Slide the caliper closed, place the inside-measuring jaws into the space to be measured, and slide the jaws apart as far as they will go. Read the measurement.
It’s a little harder to keep things lined up correctly when you are taking an inside measurement. Be sure that the calipers are not cocked, or you will not get an accurate measurement.

Depth Measurements
As you open the caliper the depth blade extends out of the far end. Use this blade to take depth measurements. Press the machined end of the caliper against the top of the hole you want to measure. Open the caliper until the depth blade contacts the bottom of the hole. Read the measurement. It can be tricky keeping the caliper straight over the hole, especially if only one side of the caliper is resting on the workpiece.

Step Measurements
Step measurement is the hidden use of a caliper. Many instructions skip this important use. But once you know about it, you will find many uses for step measurement. Open the caliper slightly. Place the sliding jaw on the upper step of the workpiece , then open the caliper until the fixed jaw contacts the lower step.
Read the measurement.

The caliper below is measuring an object that is 1.531 inches.
- Large scale lines on the bar = 1.000"
-Small scale lines on the bar = 0.100"
- Dial indicator on the caliper = 0.001
This caliper measurement would be added as follows:
1.000"
0.500"
0.031"
The sum of the three numbers equals the measurement.
Activity
Caliper #1 (Below)
Add the three dimensions: large scale, small scale, and dial indicator.
Large _______________________
Small _______________________
Dial _______________________
Total _______________________
Caliper #2
Add the three dimensions: large scale, small scale, and dial indicator.
Large _______________
Small _______________
Dial ________________
Total ________________
Caliper #3
Add the three dimensions (below): large scale, small scale, and dial indicator.
Large _______________
Small _______________
Dial ________________
Total ________________
Caliper #4:
Add the three dimensions: (below) large scale, small scale, and dial indicator.
Large ________________
Small ________________
Dial ________________
Total ________________
Caliper #5:
Add the three dimensions: (below) large scale, small scale, and dial indicator.
Large _____________
Small _____________
Dial ______________
Total _____________
Answers:
Caliper #1: 1.165" Caliper #2: 0.046" Caliper #3: 2.441" Caliper #4: 0.767" Caliper #5: 4.053"
0 comments